
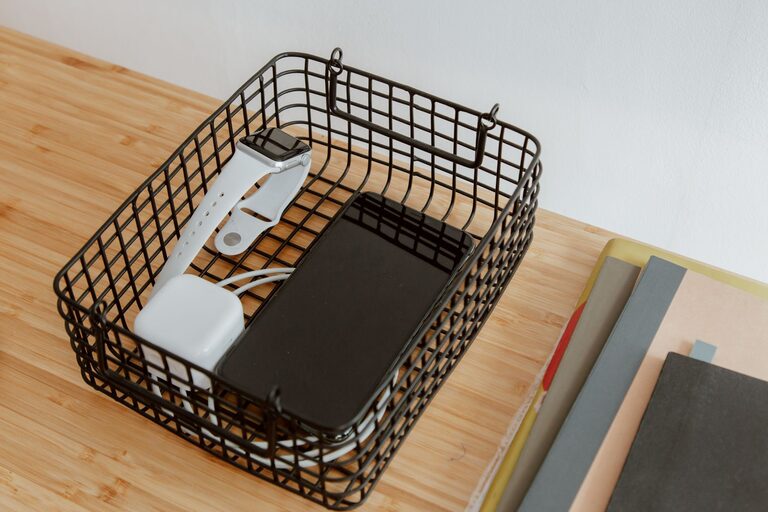
A dedicated charging station can make everyday life more convenient. Instead of searching for chargers or finding devices scattered around the room, you can keep everything in one organized location. A well-planned station also helps reduce cable clutter and makes it easier to check whether your devices are ready to use.
You do not need an expensive setup. With a suitable location, a reliable power source, and a few simple organizers, you can create a charging station for a home, office, dorm room, or shared family space.
Choose the Right Location
Start by selecting a location that is easy to reach but does not interrupt normal activity. Common choices include:
– A desk or home office shelf
– A kitchen counter or sideboard
– A nightstand
– An entryway table
– A media console
– A shelf in a shared family room
The area should be near a wall outlet or another suitable power source. Avoid placing the station where cords may cross walkways, become pinched, or be exposed to spills.
Consider how the space will be used. A bedside station may be best for phones and smartwatches, while a desk station may need room for laptops, tablets, headphones, and other accessories. If several people will use the station, choose a central location and provide enough space for each device.
Decide Which Devices Belong There
List the devices you want to charge regularly. This may include:
– Smartphones
– Tablets and e readers
– Laptops
– Smartwatches
– Wireless earbuds
– Portable speakers
– Cameras
– Handheld game systems
– Rechargeable batteries or accessories
You do not have to charge every device in one location. It may be more practical to create separate stations. For example, a small station beside the bed can hold phones and watches, while a larger workspace station can handle laptops and tablets.
Once you know which devices belong at the station, check the type of charging connection each one uses. Common cable types include USB C, Lightning, and older USB connections. Knowing this will help you choose the right charger and avoid buying unnecessary cables.
Select a Suitable Power Setup
The power setup is the central part of the station. You can use a standard power strip, a charging hub, or a combination of both.
A power strip provides several outlets for chargers and larger power adapters. A USB charging hub can reduce the number of individual wall adapters by offering multiple charging ports in one unit. Some hubs include both USB C and standard USB ports, which can be useful when charging different types of devices.
When choosing a power solution, look for:
– Enough outlets and charging ports for current needs
– A reputable manufacturer
– A sturdy design
– An appropriate power rating
– Built in safety features
– A cord that is long enough for the selected location
Avoid connecting too many power strips together. This can create an unsafe setup and make it difficult to manage the total power demand. Keep the instructions for your charger or power hub, and use it according to the manufacturer’s recommendations.
Organize and Label the Cables
Cable management is what separates a useful charging station from a pile of tangled cords. Begin by removing cables you no longer use. Then group the remaining cables by device or connection type.
Helpful organization tools include:
– Cable clips
– Velcro straps
– Cable sleeves
– Small storage boxes
– Cord labels
– Drawer dividers
– Cable management trays
Attach clips to the back or edge of the desk so cables remain within reach. Use labels such as “phone,” “tablet,” or “watch” if several cables look similar. Labeling is especially helpful in shared spaces.
Leave a little extra cable length so devices can be moved without pulling on the connections. At the same time, avoid leaving long loops hanging from the edge of a table. Secure extra cable with a reusable strap or place it inside a cable tray.
Create a Space for Each Device
A charging station works best when every device has a designated place. You can use a multi-device stand, small baskets, or separate sections in a drawer.
A stand keeps phones and tablets upright while they charge. This makes screens easy to view and helps prevent devices from being covered by books, clothing, or other objects. For smaller accessories, use a divided tray or a small container.
If you are setting up a family charging station, assign one space to each person. You can use labels, colors, or simple name cards. This reduces confusion and makes it easier to return devices to the correct location.
For laptops, make sure the station has enough surface area and ventilation. Do not place a laptop on soft materials that can block airflow. If the laptop is stored in a bag while charging, follow the manufacturer’s guidance and allow heat to escape.
Keep the Station Safe
A charging station should be convenient, but safety should come first. Keep the area dry and away from sinks, drinks, and other sources of moisture. Do not cover chargers or power hubs with clothing, papers, or other materials that could trap heat.
Inspect cables and adapters regularly. Replace any item with exposed wires, damaged insulation, bent connectors, or signs of overheating. Do not force a connector into a port, and avoid using a charger that becomes unusually hot or produces an unusual smell.
Keep the station out of reach of small children and pets when possible. Loose cables can be pulled, chewed, or caught on nearby objects. Secure cords along the back of furniture or against a wall to reduce tripping hazards.
Use chargers and cables that are designed for your devices. A cable may fit physically while still offering limited charging performance. When replacing a charger, check the device manufacturer’s specifications and choose a compatible option.
Add Useful Features
Once the basic station is working, consider adding features that improve convenience. A small shelf or raised platform can create more space below for the power strip. A drawer can hide extra cables while keeping them nearby.
Other useful additions include:
– A small device stand
– A night light for dark areas
– A timer or smart plug for selected accessories
– A power meter, if you want to monitor usage
– A notebook for recording borrowed chargers
– A small cleaning cloth for screens and devices
A label on the power strip can identify which switch controls the charging station. This is helpful if the power strip is hidden behind furniture. However, avoid turning off power to devices that need to remain connected unless you know it is appropriate for those devices.
Maintain the Charging Station
A quick monthly check can keep the station organized. Remove unused cables, wipe dust from the surface, and inspect adapters for damage. Check whether the station still meets your needs as you add or replace devices.
If the station becomes crowded, reorganize it instead of adding more cables. Move rarely used accessories to a separate storage box and keep only everyday items in the main area.
A good charging station should make your routine simpler. Choose a practical location, use reliable equipment, manage the cables, and give each device a clear place. With a small amount of planning, you can create a tidy charging area that keeps your devices ready without taking over your space.
About the Author